
How To End Laminate Flooring At Top Of Stairs?
Laminate flooring is a popular and affordable option for homeowners who want a beautiful floor without the high cost of hardwood. But when it comes to ending laminate flooring at the top of stairs, many people face challenges. The transition between the laminate floor and the stairs needs to be smooth, safe, and visually appealing. A poorly executed transition can lead to unsightly gaps or, worse, tripping hazards.
In this article, we will provide you with a step-by-step guide on how to end laminate flooring at top of stairs in a professional and safe manner. We will also cover the best tools and materials you’ll need, and the common mistakes to avoid.
Let’s dive in and make sure your laminate flooring project ends with style and safety at the top of those stairs!
Materials and Tools You Will Need
Before you start, it’s important to gather all the tools and materials. Having everything ready will save you time and prevent interruptions during the process. Here’s a list of the key items you’ll need:
| Material/Tool | Purpose |
|---|---|
| Laminate Transition Strip | Ensures a smooth and safe transition between the floor and stairs. |
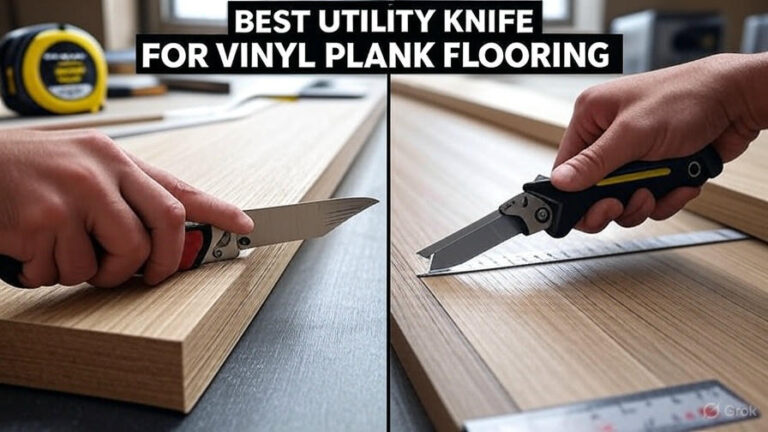
| Miter Saw | Used to cut transition strips and laminate to the correct angles. |
| Tape Measure | For precise measurements of the stair and transition area. |
| Drill with Screwdriver Bit | To secure transition strips to the floor or stair edge. |
| Finish Nails | Used to fasten transition strips if required. |
| Hammer | To insert finish nails into the transition. |
| Saw Blade (for laminate) | For cutting laminate flooring to fit the edge. |
| Spacer Wedges | To maintain proper expansion gaps around the laminate flooring. |
| Pencil | For marking accurate measurements on materials. |
Understanding Transition Types
Not all transition strips are the same, and choosing the right one for ending your laminate flooring at the top of stairs is essential. Here are the most common types:
| Transition Type | Use | Advantages |
|---|---|---|
| T-Molding | Used when laminate meets another floor of the same height. | Simple, clean, and minimalistic look. |
| End Cap | Used when laminate meets a lower surface (like stairs). | Best for creating a smooth transition from laminate to stairs. |
| Reducer | Used when laminate meets a surface that is lower. | Helps to bridge the gap where laminate meets the stairs. |
| Stair Nose | Specifically designed for stairs. | Provides a rounded, protective edge. |
Step 1: Measure and Prepare the Stair Area
Accurate measurements are key to making sure your transition strip fits properly. Here’s how to begin:
- Clean the Stair Edges: Before installing the transition, clean the edges of the stairs. This ensures no debris, nails, or old materials get in the way of a smooth installation.
- Measure the Stair Width: Measure the width of the stairs at the top of the landing. You’ll need these measurements to cut your transition strip and laminate floor to the correct size.
- Check for Levelness: Use a level tool to check if the stair edge is even. If the stairs are uneven, you may need to trim the laminate or use a reducer to accommodate the height difference.
Step 2: Choosing the Right Transition Strip
Selecting the right transition strip is crucial for both the appearance and function of the transition from laminate to stairs. Depending on the height difference between the laminate floor and the stairs, you’ll need one of these options:
- T-Molding: Best for transitions where the laminate and the stairs are the same height.
- End Cap: Perfect for when the laminate floor is higher than the stairs, providing a gradual slope.
- Reducer: Ideal for scenarios where there is a noticeable height difference between the floor and the stairs.
For most stair transitions, end caps or reducers are preferred, as they provide a smoother transition when there is a height discrepancy between the laminate and the stairs.
Step 3: Cutting the Transition Strip to Size
Now that you’ve chosen the right transition strip, it’s time to cut it to fit the area at the top of your stairs.
- Measure the Length: Measure the distance between the edge of your laminate and the stairs.
- Cut the Transition: Use a miter saw to cut the transition strip to the correct length. If necessary, cut it at an angle to fit the precise dimensions of the stair edge.
Step 4: Install the Transition Strip
Here’s how to properly install the transition strip between your laminate floor and stairs:
- Position the Transition Strip: Place the transition strip at the top of the stairs where the laminate flooring meets the stair edge. Ensure it covers the gap between the laminate and the stairs.
- Secure the Transition: Depending on the type of transition, you will either screw, nail, or use adhesive to attach the strip.
- If using screws: Drill pilot holes along the transition strip and secure it with screws.
- If using nails: Use a hammer to tap in the finish nails, ensuring the transition is secure.
- Ensure a Tight Fit: Make sure the transition strip sits flush against both the laminate floor and the stair edge. There should be no visible gaps between the two surfaces.
Step 5: Add the Finishing Touches
Once the transition strip is installed, it’s time to give it a final touch:
- Fill any Gaps: If you notice any gaps between the transition strip and the laminate, fill them with wood filler. Let it dry, and then sand it down for a smooth finish.
- Clean Up: Clean up any dust or debris from cutting the laminate and transition. Make sure the area looks neat and professional.
Common Mistakes to Avoid When Ending Laminate Flooring at the Top of Stairs
- Not Choosing the Right Transition: Choosing the wrong type of transition strip can lead to an unfinished look or unsafe edges. Ensure you select the appropriate strip based on the height difference between the laminate and stairs.
- Improper Measurements: Accurate measurements are critical for a seamless installation. Take your time measuring both the laminate and stair dimensions.
- Forgetting the Expansion Gap: Laminate flooring needs to expand and contract with temperature and humidity changes. Always leave an expansion gap between the laminate and the wall or stairs. Spacer wedges can help maintain this gap.
- Skipping Surface Preparation: Make sure the stair edges are clean and level before starting. A rough or uneven surface will affect the installation and durability of the transition strip.
Best Practices for a Professional-Looking Transition
For a flawless and professional finish when ending laminate flooring at the top of stairs, consider these tips:
- Match the Finish: Ensure that the transition strip complements the color and texture of the laminate flooring. A matching finish will create a smooth, unified look.
- Use Laminate Stair Nosings: These specially designed stair nosings offer extra protection and add a sleek, finished appearance to the top of the stairs.
- Install After Laminate: Install the transition strip after the laminate flooring is in place to avoid disrupting its expansion or contraction.
Final Thoughts
Ending laminate flooring at the top of stairs doesn’t have to be a difficult task. By following this guide, you can achieve a safe, beautiful transition that enhances the overall look of your flooring. Remember to carefully choose the right transition strip, measure accurately, and install the transition with precision.
With the right materials, tools, and a little attention to detail, your laminate flooring will look professionally finished at the top of the stairs. Whether you’re doing the work yourself or hiring a professional, these steps will ensure a seamless and safe transition between your laminate flooring and stairs.