
How to Cover Floor Tiles without Removing Them?
Removing Floor Tiles and making new flooring is costly and inconvenient. Also making quick makeovers or disruptions free is an important point in that case. So How to cover floor tiles without removing them? Is it possible to do so?
Is It Possible to Cover Tiles Without Changing Them?
Yes, it is entirely possible to cover tiles without the need to remove or change them. Various methods and materials offer alternatives to traditional tile removal, providing a diverse range of options for achieving a fresh look.
But when queried on mind that why Covering is needed? Why can’t make new floor or tile solutions? The answer is pretty cool when we see some of the good aspects and benefits to cover without removing tiles. Let’s explore:
Why Covering The Tiles? Some Good Aspects:
Covering tiles serves several practical purposes. When we think about cost saving covering it can be the best solution. On the other hand, changing the tiles practice is mostly a costly and troubled process. Here are some benefits of covering tiles:
- Cost-Effective Solution: Choosing to cover existing tiles is often a more budget-friendly option compared to the expense of removing and replacing them.
- Temporary Changes: If you have any thoughts for temporary change covering the tiles is the most suitable and beneficial way.
- Quick Makeover: Covering tiles is a swift way to transform the appearance of a room. It eliminates the time-consuming process associated with removing and replacing tiles, making it an efficient solution for those seeking a quick makeover.
- Non-Disruptive: Unlike the disruption, dust, and debris often associated with tile removal, covering tiles minimizes these inconveniences. It allows for a renovation or style update with less mess and hassle.
How to Cover Floor Tiles without Removing Them?
The way of covering also depends on your choice. Sometimes we need to mind of budget and sometimes need to care about the condition. If your tiles are in good condition or not have any damage like lifting & buckling, they are in the best condition to do cover in any great way. But Having trouble with tiles you need to think about removing them.
Anyway, here are some of the ways that can make your tile floor look as aesthetic as before. so let’s explore one-by-one methods to cover floor tiles:

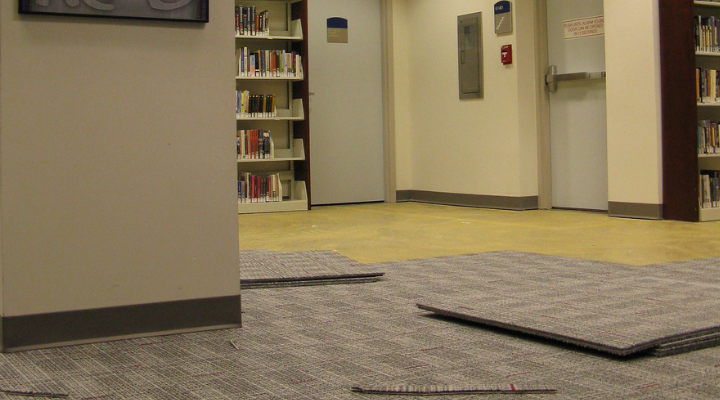
Method #1. Setup Large Area Rugs or Carpet Rolls
Large area rugs or carpet rolls can be laid directly over existing tiles, instantly changing the appearance of the space and adding warmth and comfort underfoot.
Setting up large area rugs or carpet rolls is a practical and straightforward method to cover floor tiles without removing them. Here’s how you can effectively implement this approach:
- Measure the space in your room or home
- Choose suitable rugs or rolls that look beautiful
- Prepare the surface and remove debris and dust
- Make position the rugs or rolls on the floor
- Make the edges of the rugs
- Now Arrange the furniture carefully
- To keep good condition maintain it regularly
- Lastly, Monitor for wear and tear
By following these steps, you can effectively cover floor tiles without the need for removal, creating a comfortable, stylish, and versatile living space. Large area rugs or carpet rolls offer a practical and non-permanent solution for updating the look and feel of a room while preserving the existing tile flooring underneath.

Method #2. Vinyl Tile Stickers
Peel-and-stick vinyl tile stickers offer a simple and creative way to refresh the look of tiles. These decorative stickers come in various patterns and designs, allowing for a personalized touch.
Creating vinyl tile stickers to cover floor tiles is a creative and practical solution for updating the look of a space. Here is the way:
Materials Needed:
| 1 | Self-adhesive vinyl sheets or rolls |
| 2 | Scissors or cutting machine (e.g., Cricut, Silhouette) |
| 3 | Printable vinyl paper (if using a printer) |
| 4 | Printer (if printing designs) |
| 5 | Cutting mat (if using a cutting machine) |
| 6 | Design software (e.g., Adobe Illustrator, Canva) |
| 7 | Clear vinyl laminate (optional, for added protection) |
Step-by-Steps Guide:
- Measure The Dimension and Prepare Tiles from Dust & Debris.
- Purchase Create or Print your design like patterns, graphics, or solid colors depending on your preference.
- Cutting the printed or using solid-colored vinyl sheets, it’s time to cut out the stickers.
- Application:
- Peel the backing off the vinyl stickers, revealing the adhesive side.
- Carefully place each sticker onto the corresponding tile, smoothing out any air bubbles or wrinkles as you go.
- Use a squeegee or flat edge to press the stickers firmly onto the tiles, ensuring good adhesion.
- Optional Lamination for Better Lifespan.
- Make Finishing Touches.
- If you’re not confident in your design skills, you can also find pre-made designs online or purchase ready-to-use vinyl sheets with existing patterns or designs.
Creating vinyl tile stickers allows for endless customization and personalization, giving you the freedom to design your space according to your unique style preferences. Whether you opt for intricate patterns, bold graphics, or simple solid colors, DIY vinyl tile stickers offer a cost-effective and versatile solution for covering floor tiles without removing them.

Method #3. Laminate Wooden Flooring
Floating laminate wooden flooring provides a durable and stylish covering option. The click-and-lock installation system makes it relatively easy to install over existing tiles.
Covering floor tiles with laminate wooden flooring is a popular option for those seeking a durable, attractive, and cost-effective solution. Here’s how to accomplish this transformation:
Step 1: Prepare the Surface:
Thoroughly clean the existing tile surface to remove any dirt, grease, or debris. Ensure the surface is smooth and free from imperfections.
Step 2: Measure and Plan:
Measure the room carefully to determine the amount of laminate flooring needed. Consider any obstacles or irregularities in the layout that may affect installation.
Step 3: Choose Laminate Flooring:
Select laminate flooring that is suitable for installation over existing tiles. Look for options with a click-and-lock or glueless installation system for ease of installation.
Step 4: Acclimate the Flooring:
Allow the laminate flooring to acclimate to the room’s temperature and humidity according to the manufacturer’s recommendations. This helps prevent warping or buckling after installation.
Step 5: Install Underlayment:
Lay down a suitable underlayment over the tile surface to provide cushioning and moisture protection. Underlayment helps smooth out minor imperfections in the tile surface.
Step 6: Begin Installation:
Start installation in a corner of the room, preferably opposite the main entrance. Place spacers along the walls to maintain the expansion gap required for laminate flooring.
Step 7: Interlock Planks:
Lay the laminate planks row by row, interlocking them securely using the manufacturer’s recommended method. Stagger the end joints of adjacent rows for a more stable and visually appealing installation.
Step 8: Cut Planks as Needed:
Use a saw to cut planks to fit around obstacles such as door frames or irregular room shapes. Ensure precise measurements and cuts for a seamless finish.
Step 9: Maintain Expansion Gaps:
Leave a small expansion gap (usually around ¼ inch) between the laminate flooring and the walls, cabinets, or other fixed structures. This allows for natural expansion and contraction of the flooring.
Step 10: Complete Installation:
Continue installing laminate flooring row by row until the entire room is covered. Use a tapping block and mallet to ensure tight seams between planks.
Step 11: Install Baseboards or Molding:
Install baseboards or molding around the perimeter of the room to cover the expansion gap and provide a finished look.
Step 12: Finishing Touches:
Clean the newly installed laminate flooring to remove any dust or debris. Enjoy your refreshed space with beautiful laminate wooden flooring covering the existing tile surface.
By following these steps, you can achieve a stunning transformation by covering floor tiles with laminate wooden flooring without the need for extensive tile removal.

Method #4. Make Epoxy Resin Coating
Applying an epoxy resin coating over tiles can create a seamless and modern surface. This method not only covers the tiles but also adds a layer of protection.
Making an epoxy resin coating to cover floor tiles without removing them is a popular method for transforming the appearance of existing tiles. Here’s a step-by-step guide to creating an epoxy resin coating:
Materials Needed:
| 1 | Epoxy resin kit (includes resin and hardener) |
| 2 | Painter’s tape |
| 3 | Drop cloths or plastic sheeting |
| 4 | Stirring sticks |
| 5 | Mixing containers |
| 6 | Epoxy-compatible pigment or dye (optional) |
| 7 | Sealant (optional) |
Steps to Make Epoxy Resin Coating:
Step 1: Preparation
Clean the tile surface thoroughly to remove any dirt, grease, or debris. Ensure the tiles are completely dry before proceeding.
Step 2: Surface Protection
Use painter’s tape to mask off any areas you don’t want to coat with epoxy resin, such as baseboards or adjacent surfaces. Lay down drop cloths or plastic sheeting to protect surrounding areas from drips and spills.
Step 3: Mixing Epoxy Resin
Follow the manufacturer’s instructions to mix the epoxy resin and hardener in the specified ratio. Use separate mixing containers for each component and stir thoroughly to ensure proper blending.
Step 4: Adding Pigment (Optional)
If desired, add epoxy-compatible pigment or dye to the resin mixture to achieve the desired color. Mix thoroughly until the pigment is evenly distributed.
Step 5: Application
Pour the mixed epoxy resin onto the tile surface in a thin, even layer. Use a foam roller or brush to spread the resin evenly across the tiles, ensuring full coverage.
Step 6: Bubble Removal
After applying the epoxy resin, use a heat gun or propane torch to carefully pass over the surface to remove any air bubbles. This step helps achieve a smooth finish.
Step 7: Curing
Allow the epoxy resin to cure according to the manufacturer’s instructions. This typically involves allowing the coating to dry and harden for a specified period, often 24-72 hours depending on the product and environmental conditions.
Step 8: Optional Sealant (Optional)
Once the epoxy resin has fully cured, consider applying a sealant to enhance durability and protect the surface from scratches and stains. Follow the manufacturer’s instructions for the sealant application process.
Step 9: Final Inspection
Once the epoxy resin coating is fully cured and sealed (if applicable), inspect the surface for any imperfections or areas that may require touch-ups. Make any necessary adjustments to achieve the desired finish.
By following these steps, you can create a durable and attractive epoxy resin coating to cover floor tiles without the need for removal. This method offers a cost-effective and visually appealing way to update the look of your space while retaining the existing tile substrate.

Method #5. Choose Artificial Grass
Artificial grass is an excellent choice for outdoor areas, transforming a tile-covered patio or balcony into a green, low-maintenance space.
Covering floor tiles with artificial grass is a creative and versatile solution that offers several benefits:
Here’s Some Artificial Grass Benefits:
- Natural Aesthetic Appeal
- Soft and Comfortable Surface
- Low Maintenance Need
- Durable and Long-lasting to Use
- All-Weather Usable
- Versatile Application Edge to Edge
- Can Make Customizable Design
- Environmental Benefits
Overall, covering floor tiles with artificial grass offers a practical, aesthetic, and eco-friendly solution for enhancing indoor and outdoor spaces.
Whether used for recreational purposes, landscaping, or decorative accents, artificial grass provides a green and sustainable alternative that transforms ordinary areas into inviting and enjoyable environments.

Method #6. Wrap-up Sheet Vinyl Flooring
Sheet vinyl flooring can be rolled out and installed directly over existing tiles, providing a smooth and cohesive surface.
Wrapping up sheet vinyl flooring over existing floor tiles is a practical and effective method to cover them without the need for removal. This approach offers numerous benefits, making it a popular choice for homeowners looking to refresh their space. Here’s why wrapping up sheet vinyl flooring is a viable solution:
Here’s Some Sheet Vinyl Flooring Benefits:
- Cost-Effective Solutions
- Quick Installation Process
- Versatile Design Options Can Make a wide range of designs, colors, and patterns
- Durable and Low Maintenance Solution
- Smooth and Seamless Finish Make a Cohesive look.
- Moisture Resistance
- Comfort Underfoot for walking and standing
- DIY-Friendly Installation Process
- Non-Permanent Solution Give a Value to Use
Overall, wrapping up sheet vinyl flooring offers a practical, cost-effective, and aesthetically pleasing way to cover floor tiles without the need for removal, providing homeowners with a durable and stylish flooring option for their space.
Method #7. Use Carpet Tiles
Adhesive-backed carpet tiles offer a customizable and comfortable solution. They can be arranged in various patterns and easily replaced if needed.
Covering floor tiles with carpet tiles is a practical and versatile solution that offers several benefits. Here’s how you can effectively use carpet tiles to cover existing floor tiles without the need for removal:
Step-by-step Carpet Tiles Installation:
Step 1: Preparation:
Ensure that the existing floor tiles are clean, dry, and free from any debris or irregularities. Thoroughly vacuum or sweep the surface to create a smooth and even base for the carpet tiles.
Step 2: Selecting Carpet Tiles:
Choose carpet tiles that complement the aesthetic of your space and meet your functional needs. Consider factors such as color, pattern, texture, and durability when selecting the tiles.
Step 3: Measuring and Planning:
Measure the dimensions of the room and calculate the number of carpet tiles needed to cover the entire floor surface. Create a layout plan to determine the placement of the tiles and ensure a balanced and visually appealing design.
Step 4: Starting Point:
Begin installation from a corner of the room, preferably the one farthest from the entrance, to allow for easy access and progression across the space.
Step 5: Installation Process:
- Peel off the backing of the first carpet tile and position it firmly in the chosen starting corner, ensuring it aligns with the layout plan.
- Continue installing subsequent tiles, working row by row and maintaining consistent spacing between each tile to achieve a uniform appearance.
- Use a utility knife or carpet cutter to trim tiles as needed to fit around obstacles, corners, or irregularities along the edges of the room.
- Press down firmly on each tile to ensure proper adhesion to the existing floor tiles and eliminate any air bubbles or gaps.
Step 6: Finishing Touches:
Once all carpet tiles are installed, use a heavy roller or weighted object to apply pressure evenly across the entire floor surface. This helps to secure the tiles in place and ensure strong adhesion.
Install transition strips or molding along the edges of the room to provide a clean and finished look, as well as to protect the edges of the carpet tiles.
Step 7: Maintenance and Care:
Regularly vacuum or sweep the carpet tiles to remove dirt, dust, and debris. Spot clean stains promptly using a mild detergent and warm water, following the manufacturer’s recommendations for care and maintenance.
By following these steps, you can effectively use carpet tiles to cover existing floor tiles without the need for removal, achieving a refreshed look and adding warmth and comfort to your space.
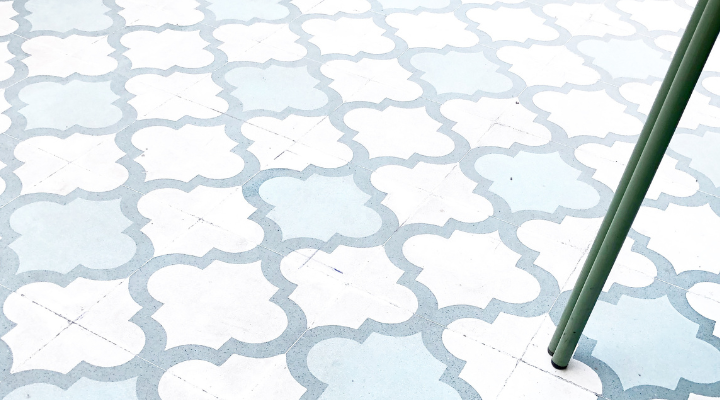
Method #8. Paint the Tiles with Stencil
Stenciling and painting tiles allow for a creative and personalized approach. This DIY method adds a unique design element to the existing tile surface.
Painting tiles with stencils is a creative and budget-friendly way to refresh the look of your tiled surfaces without the need for removal. Here’s how you can achieve this transformation:
Materials Needed:
| Materials | Descriptions |
|---|---|
| Stencils | Choose high-quality stencils in your desired patterns or designs. |
| Paint | Select a paint suitable for tile surfaces, such as acrylic or enamel paint. Ensure it is compatible with the type of tiles you have. |
| Paintbrushes | Use small to medium-sized paintbrushes for precise application. |
| Painter’s Tape | Use painter’s tape to secure the stencil in place and protect surrounding areas from paint. |
| Primer (Optional) | If your tiles have a glossy finish, consider using a primer specifically formulated for tile surfaces to improve paint adhesion. |
Now, Follow These Steps:
Step 1: Clean the Tiles
Thoroughly clean the tile surface to remove any dirt, grime, or grease. Use a mild detergent and water solution, and allow the tiles to dry completely.
Step 2: Prepare the Area
Protect surrounding surfaces and areas from paint splatters by covering them with painter’s tape and drop cloths.
Step 3: Stencil Placement
Position the stencil on the tile surface in your desired location. Use painter’s tape to secure the stencil firmly in place, ensuring it doesn’t shift during painting.
Step 4: Apply Paint
Dip a paintbrush into the paint, then blot off any excess on a paper towel to prevent drips.
Carefully fill in the stencil design with paint, using light, even strokes to avoid bleeding under the stencil edges. Apply multiple thin coats as needed for full coverage, allowing each coat to dry completely before applying the next.
Step 5: Remove the Stencil
Once you’ve finished painting the stencil design, carefully remove the stencil while the paint is still wet to avoid smudging. Peel away the painter’s tape used to secure the stencil.
Step 6: Touch-Ups (if necessary)
After the paint has dried completely, inspect the stencil design for any areas that may need touch-ups or corrections. Use a small paintbrush to fix any imperfections.
Step 7: Allow for Cure Time
Allow the paint to cure completely according to the manufacturer’s instructions before subjecting the tiled surface to regular use or cleaning.
Step 8: Seal the Paint (Optional)
To enhance durability and longevity, consider applying a clear sealant or varnish over the painted tiles. This will help protect the painted surface from wear and tear, as well as moisture.
By following these steps, you can successfully paint your tiles with stencils to achieve a customized and visually appealing look without the need for removal. It’s a great way to add personality and style to your space while saving time and money compared to traditional tile replacement.

Method #9. Laying Pergo XP Method
Installing Pergo XP or similar laminate flooring with a click-and-lock system enables a quick and hassle-free covering method.
Laying Pergo XP or similar laminate flooring over existing floor tiles without removing them is a practical and efficient way to update the look of a space. Here’s a step-by-step guide on how to accomplish this method:
Materials Needed:
- Pergo XP or laminate flooring of your choice
- Underlayment (if not included with the flooring)
- Spacers
- Tape measure
- Circular saw or miter saw
- Hammer and tapping block
- Transition strips (if necessary)
- Adhesive (optional, depending on the installation method)
Step-by-Step Process:
- Prepare the Surface:
- Clean the existing tile surface thoroughly to remove any dirt, debris, or residue. Ensure the tiles are level and in good condition.
- Acclimate the Flooring:
- Allow the Pergo XP or laminate flooring to acclimate to the room’s temperature and humidity for at least 48 hours before installation.
- Install Underlayment (if necessary):
- If the laminate flooring does not come with an attached underlayment, roll out and install underlayment over the tile surface to provide cushioning and sound absorption.
- Measure and Cut Planks:
- Measure the dimensions of the room and calculate the number of planks needed. Use a circular saw or miter saw to cut the planks to size, leaving a 1/4-inch expansion gap along the perimeter of the room.
- Begin Installation:
- Start in a corner of the room and lay the first row of planks along the longest wall, with the tongue side facing the wall. Use spacers to maintain the expansion gap.
- Continue Installation:
- Assemble subsequent rows by locking the tongue and groove edges of the planks together. Stagger the end joints of adjacent rows by at least 12 inches for a more stable and visually appealing installation.
- Cutting Around Obstacles:
- When encountering obstacles such as door frames or vents, measure and cut the planks accordingly to fit around them. Use a tapping block and hammer to ensure a snug fit.
- Complete the Installation:
- Continue installing planks row by row until you reach the opposite wall. Cut the last row of planks to fit, leaving another 1/4-inch expansion gap.
- Install Transition Strips (if necessary):
- If transitioning between different flooring types or rooms, install transition strips at doorways or between rooms to provide a smooth transition and cover expansion gaps.
- Final Checks:
- Once the installation is complete, remove spacers and inspect the flooring for any gaps or inconsistencies. Make any necessary adjustments before walking on the floor.
Note: Depending on the specific conditions of your existing tile floor and the manufacturer’s recommendations, you may use adhesive or additional underlayment for added stability. Always follow the manufacturer’s instructions and guidelines for the proper installation of the laminate flooring.
Can All the Tiles Be Covered?
While covering tiles is a viable option for many situations, its success depends on factors such as the type and condition of the existing tiles, as well as the chosen covering method. It’s essential to assess the tiles’ condition and follow recommended guidelines for the specific covering material.
Some Tips to Get the Best Covering the Tiles:
- Surface Preparation: Ensure the existing tile surface is clean, smooth, and free from debris before applying the chosen covering material. Proper preparation is key to a successful outcome.
- Choose Quality Materials: Select high-quality covering materials to ensure durability and longevity. Invest in products that are designed for the specific purpose of covering tiles.
- Follow Manufacturer Instructions: Adhere strictly to the manufacturer’s guidelines and instructions for the chosen covering material. Proper installation is crucial for achieving the desired results.
- Consider Subfloor Condition: Evaluate the condition of the subfloor beneath the tiles. Ensure that it is suitable for the chosen covering method and address any issues before proceeding.
Final Thoughts:
Covering tiles without removing them offers a practical and versatile solution for individuals seeking an economical, quick, and non-disruptive way to update their living spaces. The variety of covering options available allows for creativity and personalization while catering to different styles and preferences.
By considering factors such as the condition of existing tiles, the chosen covering material, and proper installation techniques, individuals can achieve a successful and aesthetically pleasing transformation.
Related Queries:
What Are The Benefits Of Covering Tile Floors?
Covering tile floors can provide a fresh look, protect the original tiles, and offer insulation against cold floors. It also allows for easy cleanup and the ability to change the decor without the expense of re-tiling.
What Materials Are Suitable For Covering Tile Floor?
Several materials work well for covering tile floors, including laminate, vinyl, engineered hardwood, and carpet tiles. Each material has its advantages, such as durability, water resistance, and ease of installation.
How Can I Prepare The Tile Floor For Covering?
Before covering a tile floor, ensure it is clean, dry, and level. Use a suitable primer or underlayment if needed. Fill in any cracks or gaps and ensure the surface is debris-free for the best results.


